This sample android program shows you how to do simple animation in Android. In this program the xml file ani.xml is used to rotate the images in sequence. The images must be copied to the /res/drawable folder together with the ani.xml file.
TheFrameAnimation1.java file is as follows:
package com.javasamples.ani;

import android.app.Activity;
import android.graphics.drawable.AnimationDrawable;
import android.os.Bundle;
import android.view.View;
import android.widget.*;

public class FrameAnimation1 extends Activity {
	Button b;

	@Override
	public void onCreate(Bundle savedInstanceState) {
		super.onCreate(savedInstanceState);
		setContentView(R.layout.main);
		this.setupButton();
	}

	private void setupButton() {
		b = (Button) this.findViewById(R.id.startFAButtonId);
		b.setOnClickListener(new Button.OnClickListener() {
			public void onClick(View v) {
				parentButtonClicked(v);
			}
		});
	}

	private void parentButtonClicked(View v) {
		animate();
	}

	private void animate() {
		ImageView imgView = (ImageView) findViewById(R.id.animationImage);
		// imgView.setVisibility(ImageView.VISIBLE);
		imgView.setBackgroundResource(R.drawable.ani);

		AnimationDrawable frameAnimation = (AnimationDrawable) imgView
				.getBackground();

		if (frameAnimation.isRunning()) {
			frameAnimation.stop();
			b.setText("Start");
		} else {
			frameAnimation.start();
			b.setText("Stop");
		}
	}
}// eof-class
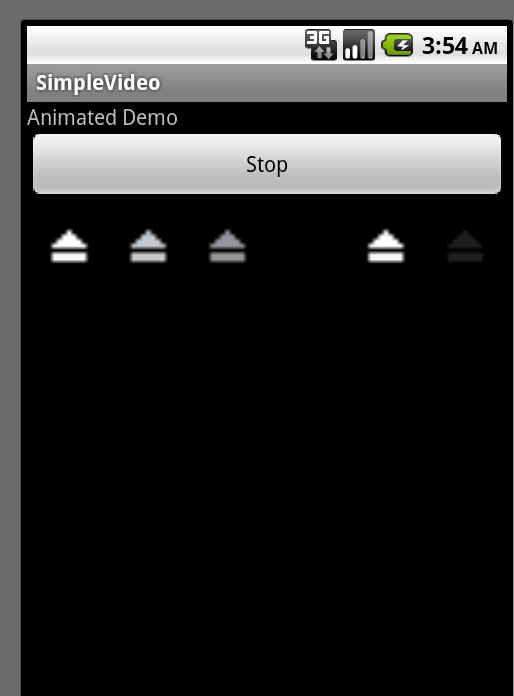
The output of this program will be as shown in the android emulator below.
The main.xml file in your res/layout folder is as follows:
<?xml version="1.0" encoding="utf-8"?>
<LinearLayout
	xmlns:android="http://schemas.android.com/apk/res/android"
	android:orientation="vertical"
	android:layout_width="fill_parent"
	android:layout_height="fill_parent">
	<TextView
		android:id="@+id/textViewId1"
		android:layout_width="fill_parent"
		android:layout_height="wrap_content"
		android:text="Animated Demo" />
	<Button
		android:id="@+id/startFAButtonId"
		android:layout_width="fill_parent"
		android:layout_height="wrap_content"
		android:text="Start Animation" />
	<ImageView
		android:id="@+id/animationImage"
		android:layout_width="fill_parent"
		android:layout_height="wrap_content" />
</LinearLayout>
In addition to the main.xml, you need to create another xml file ani.xml with the following code in your res/drawable folder. In that same folder, you also need to copy your image files that you specifiy in the ani.xml
<animation-list
xmlns:android="http://schemas.android.com/apk/res/android"
android:oneshot="false">
<item
android:drawable="@drawable/icon"
android:duration="50" />
<item
android:drawable="@drawable/icon1"
android:duration="50" />
<item
android:drawable="@drawable/icon2"
android:duration="50" />
</animation-list>
Comments
Post a Comment